Company Onboarding
This chapter explains what happens immediately after you register a new company. The first administrator is guided through three short steps to set up the minimum structure needed before the dashboard becomes accessible.
If your company is already set up and you are not the first administrator, skip this chapter and go directly to Initial Setup.
What Is Company Onboarding
After a new company is registered, the application opens an onboarding flow before the dashboard is available. Onboarding is required because the system needs a few pieces of information to function:
- A position for the first administrator, used in approval flows.
- At least one expense category, so employees can classify expense lines when submitting reimbursements.
- A name for the first reimbursement form, so employees have a form to submit against.
In this guide, expense category means the master data used inside reimbursement detail rows, while reimbursement form means the claim form employees choose at the start of a reimbursement.
All answers can be changed after onboarding is complete.
Who Sees Onboarding
Only the first administrator of a company sees the onboarding flow. Onboarding has three short steps.
Other users added later go directly to the dashboard after signing in.
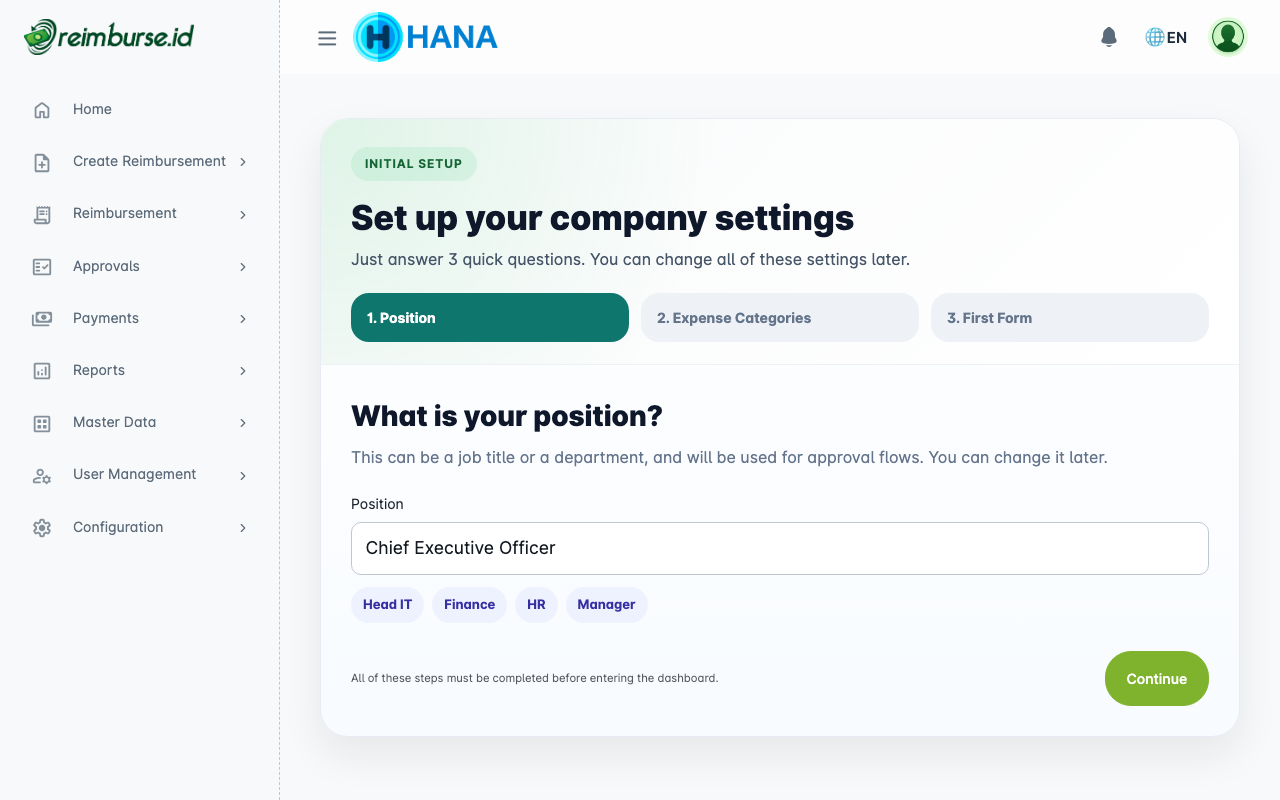
Step 1: Set Your Position
The first step asks for the first administrator's position.
| Field | What To Enter | Notes |
|---|---|---|
| Position | A job title or position name. | Examples: Director, Head of Finance, HR, Manager. |
The position you enter here is assigned to the first administrator and is used in approval flows. For example, if a reimbursement form uses a supervisor-based approval rule, the position hierarchy determines who approves what.
You can rename or reorganize positions later in Master Data → Position.
- Type the position name in the field.
- Click Continue.
Step 2: Set Expense Categories
The second step asks for at least one expense category.
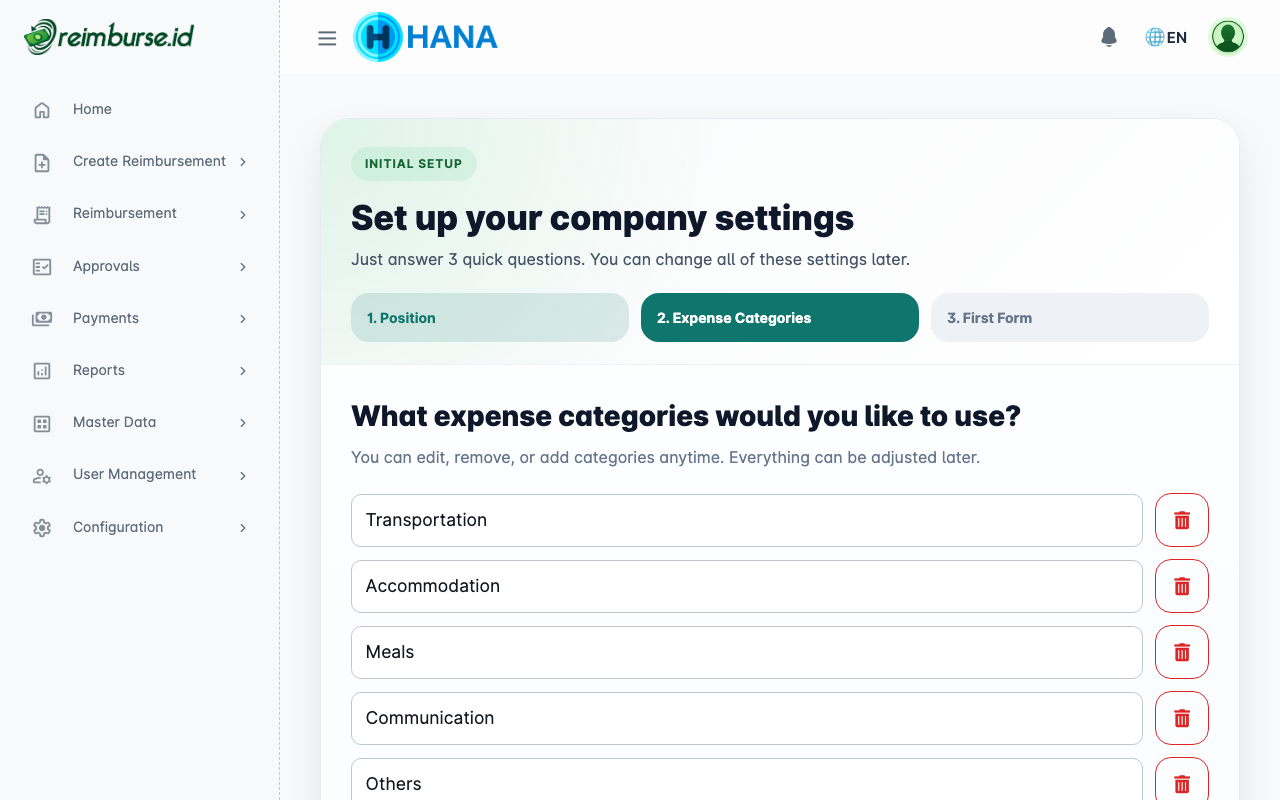
Expense categories define what type of expense an employee is claiming in reimbursement detail rows. For example, taxi fare can be categorized as Transportation.
| What To Do | Notes |
|---|---|
| Type a category name in the field. | Examples: Transportation, Accommodation, Meals. |
| Click Add to add more categories. | You can add as many as you need. |
| Click the trash icon to remove a row. | At least one category must remain. |
At least one expense category is required to proceed. You can add, rename, or deactivate categories later in Master Data → Expense Category.
- Fill in the first category.
- Add more categories if needed.
- Click Continue.
Step 3: Name The First Reimbursement Form
The third step asks for a name for the first reimbursement form.

| Field | What To Enter | Notes |
|---|---|---|
| First form name | A name for the reimbursement form. | Examples: General Form, Travel Form. |
The reimbursement form is what employees select when they create a reimbursement. Each form can have its own fields, document numbering, and approval rules.
You only need to name the first form here. You can configure its fields and approval rules in detail later through Configuration → Reimbursement Forms.
- Type a form name.
- Click Finish Setup.
Onboarding Complete
After the third step is submitted, the application creates the initial structure and opens the completion screen.
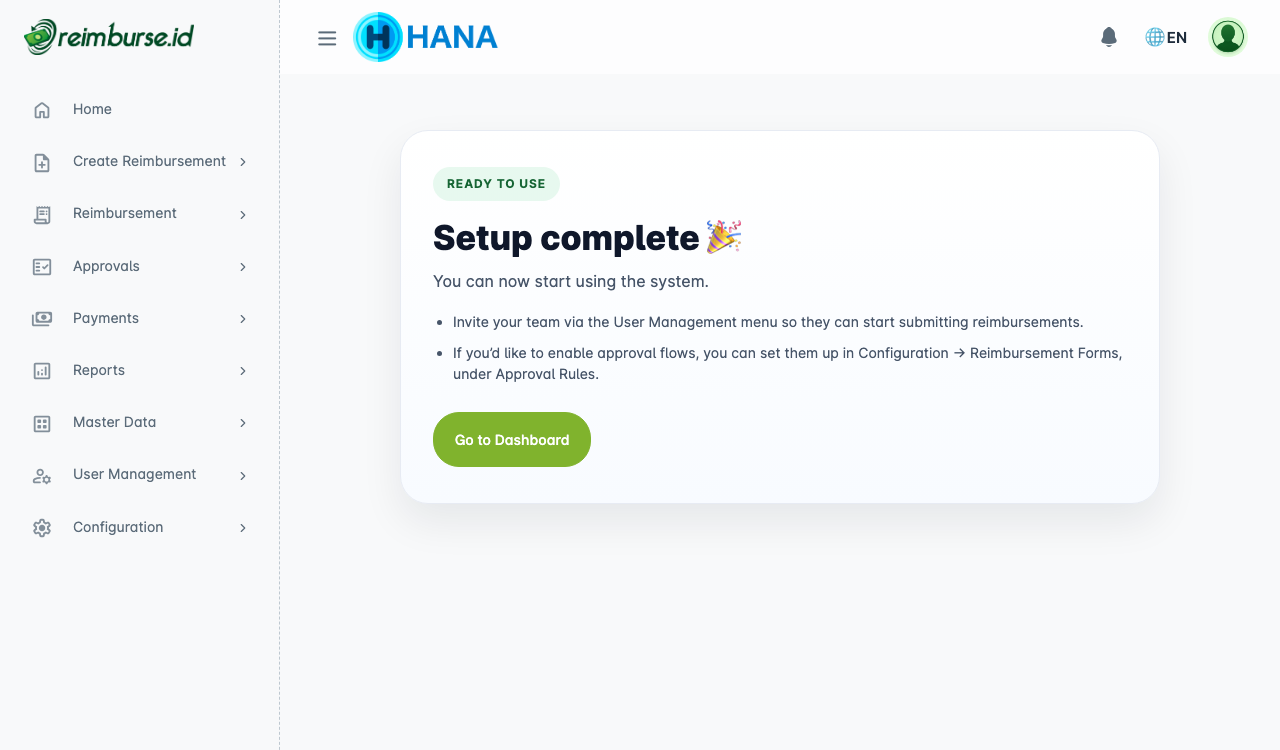
The completion screen confirms that setup is done and provides quick reminders of what to do next:
- Invite your team through User Management → User so employees can start submitting reimbursements.
- Set up approval flows in Configuration → Reimbursement Forms → Approval Rules if your company needs an approval process.
Click Go to Dashboard to open the dashboard and begin using reimburse.id.
What Was Created During Onboarding
After onboarding completes, the following minimum structure exists in your company:
| Item | What Was Created |
|---|---|
| Position | One position with the name you entered in step 1. |
| Expense Category | One or more expense categories with the names you entered in step 2. |
| Reimbursement Form | One reimbursement form with the name you entered in step 3. |
These are starting points. You can add more positions, expense categories, and reimbursement forms at any time.
What Comes Next
Onboarding creates the minimum structure. Most companies need additional configuration before employees can start submitting reimbursements. Continue with Initial Setup to:
- Add more positions and build the position hierarchy.
- Add users and assign roles.
- Configure reimbursement forms, document numbering, and approval rules.
- Set up work calendars and other company settings.
Common Problems
| Problem | What To Do |
|---|---|
| You cannot see the onboarding screen after logging in. | Onboarding only appears for the first administrator before setup is complete. If you are already past onboarding, go to the dashboard directly. |
| The Continue button is not available. | Make sure the required field is filled. The button activates only when the field has a value. |
| You want to change something you entered during onboarding. | All onboarding answers can be changed after setup. Use Master Data or Configuration menus to update positions, expense categories, and reimbursement forms. |
| You completed onboarding but cannot find the reimbursement form. | Go to Configuration → Reimbursement Forms to view and configure the form created during onboarding. |