Initial Setup
This chapter explains the configuration steps after company onboarding is complete. It covers master data, user management, and system configuration that should be in place before employees start submitting reimbursements.
If you have just completed company onboarding, follow this chapter from top to bottom. If your company is already configured and you need to change a specific setting, use the section links to jump to the relevant area.
Recommended Setup Order
Setting up in the right order prevents missing options and broken approval flows.
| Step | Menu | What To Do |
|---|---|---|
| 1 | Master Data | Create positions, expense categories, and banks. |
| 2 | User Management | Create roles, add users, and assign positions. |
| 3 | Configuration | Configure company settings, custom fields, user custom fields, reimbursement forms, print templates, batch payment forms, work calendar, and close period. |
| 4 | Verify | Submit a sample reimbursement and confirm the approval flow works correctly. |
Following this order matters because:
- Users need positions before they can be placed in the company structure.
- Reimbursement forms rely on expense categories because employees select an expense category in each reimbursement detail row.
- Approval rules need positions and users before they can route documents correctly.
1. Master Data
Master data is shared reference data used across the application. Set it up before creating users and configuring forms.
Master Data is located in the sidebar under Master Data. It contains three sub-menus: Position, Expense Category, and Bank.
Important distinction:
- Expense Category is master data for expense detail lines such as Transportation, Hotel, or Meals.
- Reimbursement Form is the claim form employees choose first, such as General Claim or Travel Claim.
Position
Open Master Data → Position.
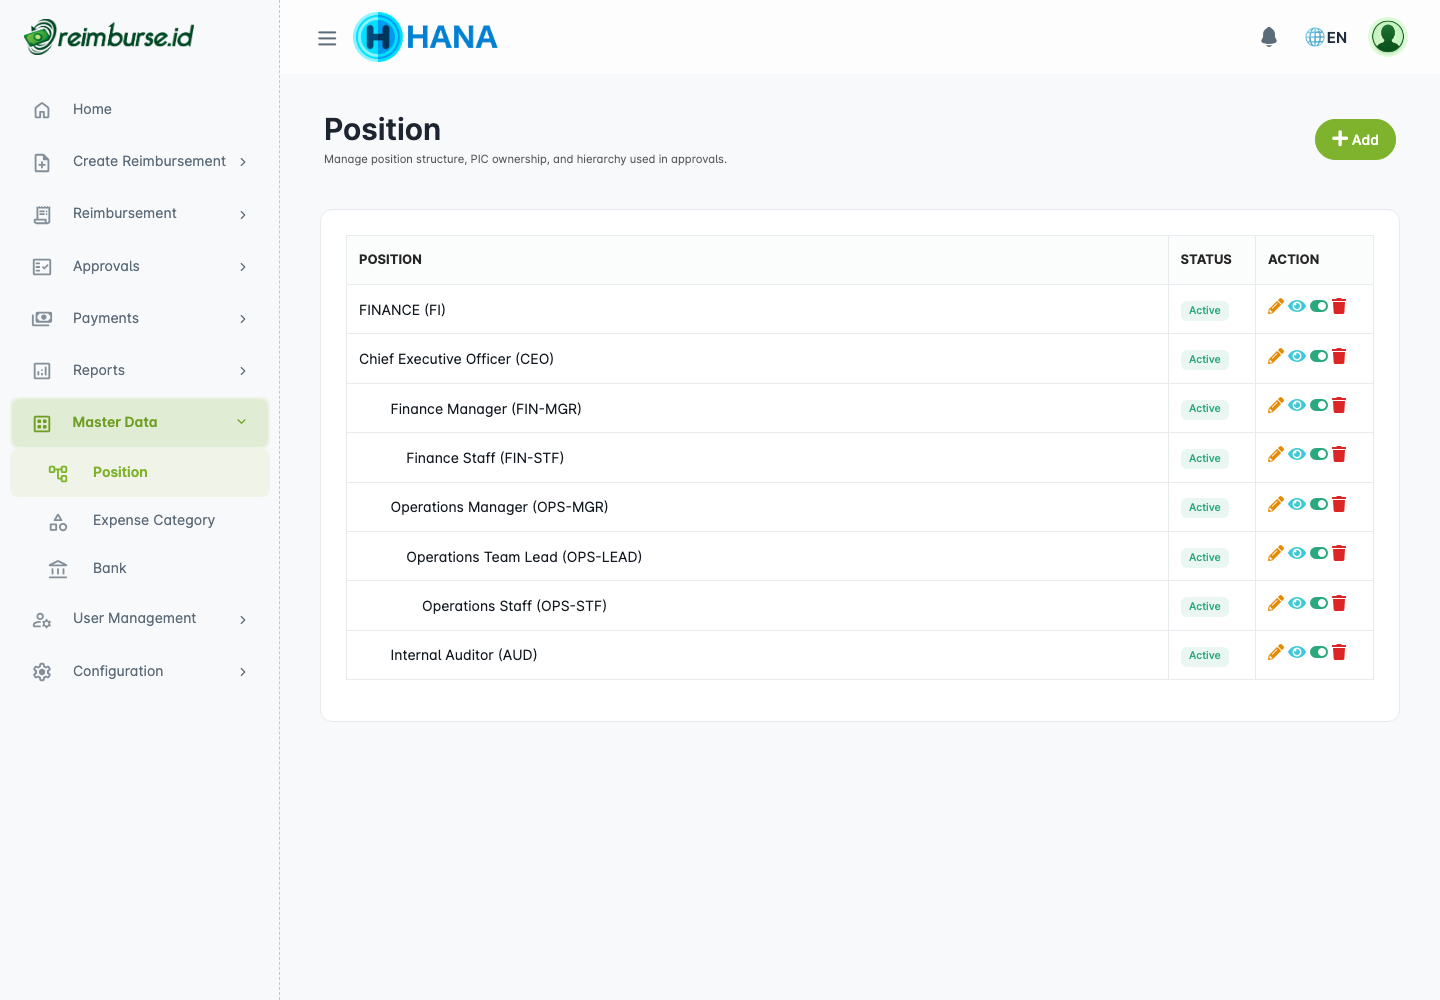
Position represents the company structure. It determines where each user sits in the organization and affects approval routing.
A clear position structure makes approval rules easier to understand and manage. Example:
Each position can have:
| Property | Meaning |
|---|---|
| Name | The position name, such as Finance Manager or Operations Staff. |
| Code | A short identifier for the position. |
| Parent position | The position directly above this one in the hierarchy. |
| PIC (Person In Charge) | The user responsible for this position. Used by PIC-based approval rules. |
| Active / Inactive | Controls whether the position can be assigned to users. |
Recommended setup steps:
- Create the top-level position first, for example
Chief Executive Officer. - Create manager-level positions under the top position.
- Create staff-level positions under each manager.
- Assign a PIC to positions that need a responsible approver.
- Deactivate positions that are no longer needed instead of deleting them, especially if they have user or approval history.
Important terms used in approval rules:
| Term | Meaning |
|---|---|
| Supervisor | The PIC of the position directly above the submitter's position. |
| PIC Top Position | The PIC assigned to the highest-level position in the submitter's position branch. |
Expense Category
Open Master Data → Expense Category.
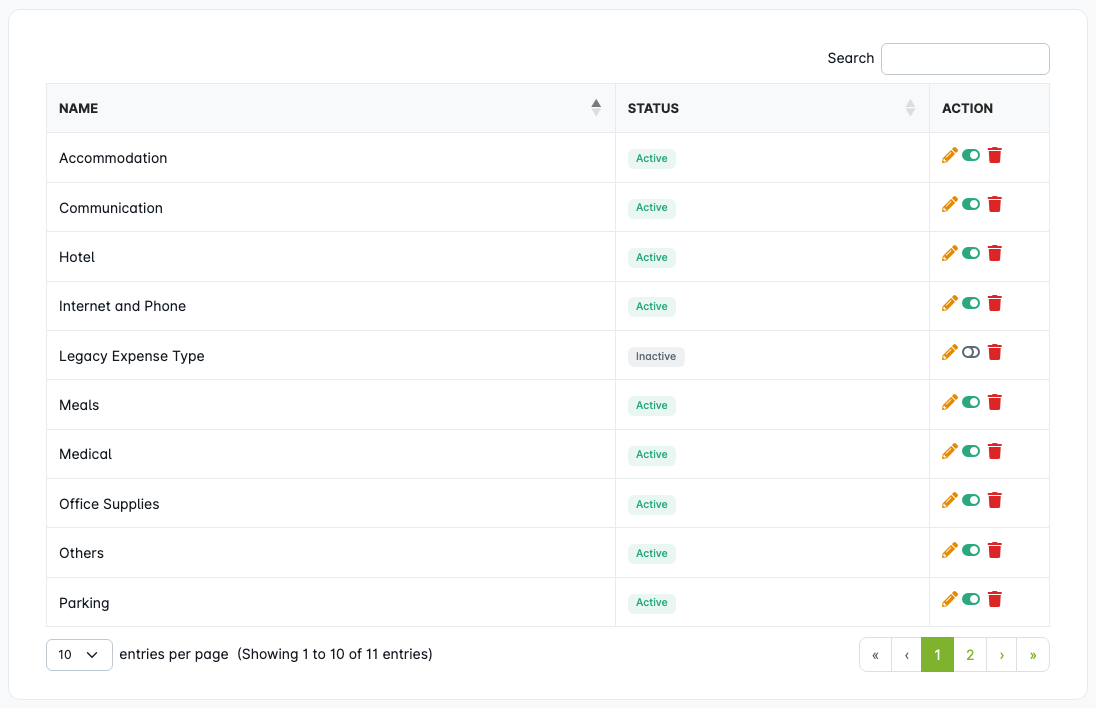
Expense categories classify the type of expense an employee is claiming. When a user adds an expense line inside a reimbursement, they select an expense category to describe that expense.
Examples: Transportation, Accommodation, Meals, Office Supplies, Medical.
| Action | What It Does |
|---|---|
| Create | Adds a new expense category. |
| Edit | Updates the category name. |
| Activate / Deactivate | Controls whether the category appears when users create reimbursement details. |
| Delete | Deletes the category only when it has not been used in any reimbursement. |
Recommended practice:
- Keep category names short and clear so employees can select the right one quickly.
- Deactivate old categories instead of deleting them. Historical reimbursements that used the category will remain readable.
- Review the category list periodically so employees only see relevant options.
Bank
Open Master Data → Bank.
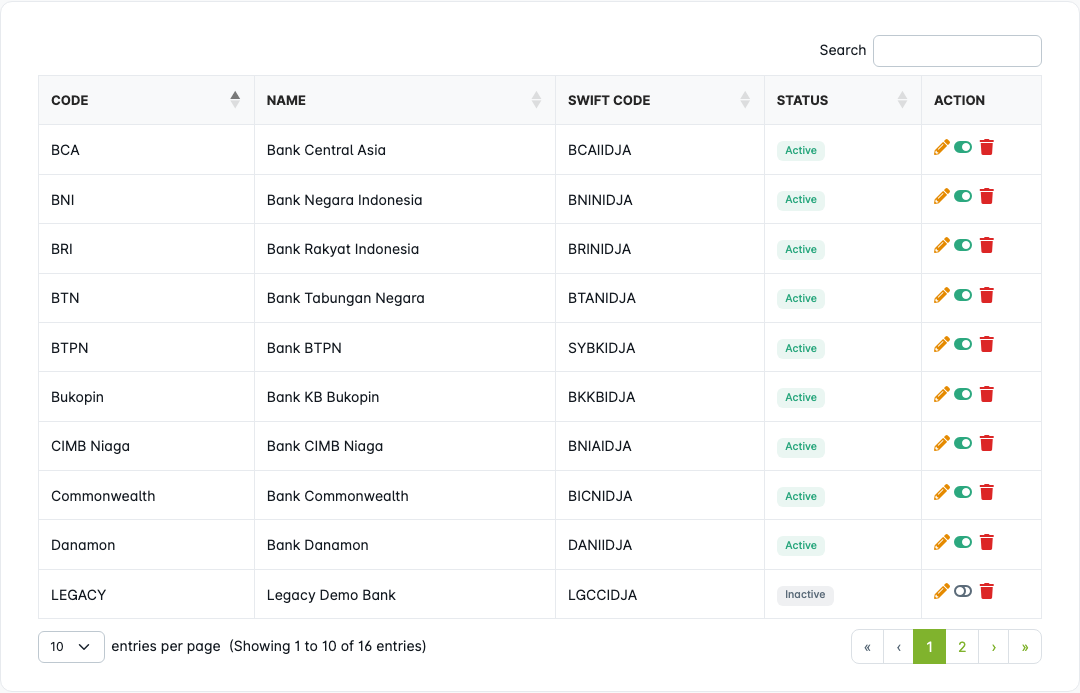
Bank master data provides the list of banks that users can select when filling in their bank account information. It also supports bank references in reports and payment-related records. At the moment, this bank master is not used to trigger automatic bank transfers.
| Action | What It Does |
|---|---|
| Create | Adds a new bank. |
| Edit | Updates the bank name or code. |
| Activate / Deactivate | Controls whether the bank appears in user profile and payment forms. |
| Delete | Deletes the bank only when it has not been used by any user or reimbursement. |
Recommended practice:
- Create banks that employees and the payment team commonly use.
- Deactivate banks that are no longer relevant instead of deleting them.
2. User Management
User Management controls who can access the application and what they can do. It is located in the sidebar under User Management and contains two sub-menus: Role and User.
Role
Open User Management → Role.
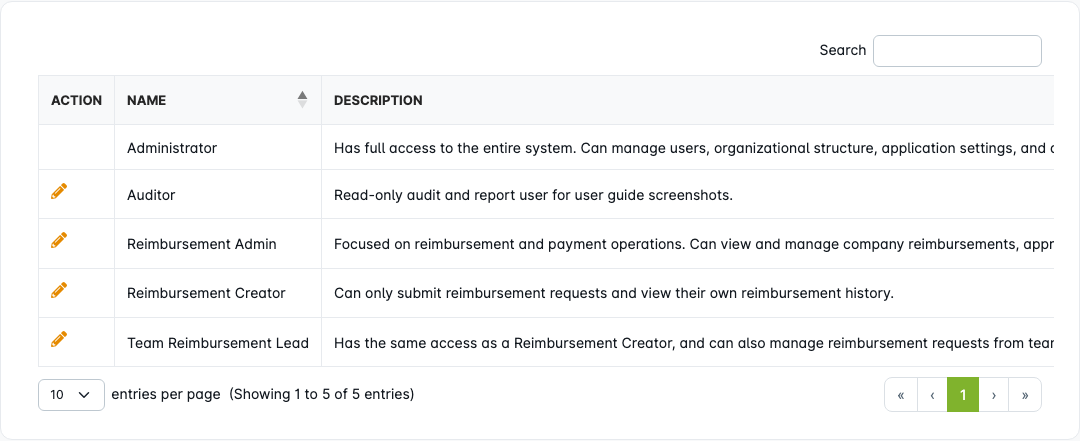
A role defines what menus and actions a user can access. Every user must have exactly one role.
The application comes with default roles. Common examples:
| Role | Typical Access |
|---|---|
| Administrator | Full access to company setup, user management, and all reimbursement data. |
| Reimbursement Creator | Can create and track their own reimbursements. |
| Team Reimbursement Lead | Same as Reimbursement Creator, plus can view reimbursements from team members in their position hierarchy. |
| Reimbursement Admin | Can manage all reimbursements, process payments, and handle batch payments. Commonly used by payment teams. |
When editing a role, review both menu access and action permissions. Some menus include extra actions such as create, edit, delete, export, approve, or process payment.
Recommended practice:
- Review the default roles before creating new ones. Default roles cover common use cases.
- Create a new role only when an existing role does not match your company policy.
- Give each user the minimum access they need to do their work.
- After assigning a role to a user, sign in with that user's account to confirm the menus and actions are correct.
User
Open User Management → User.
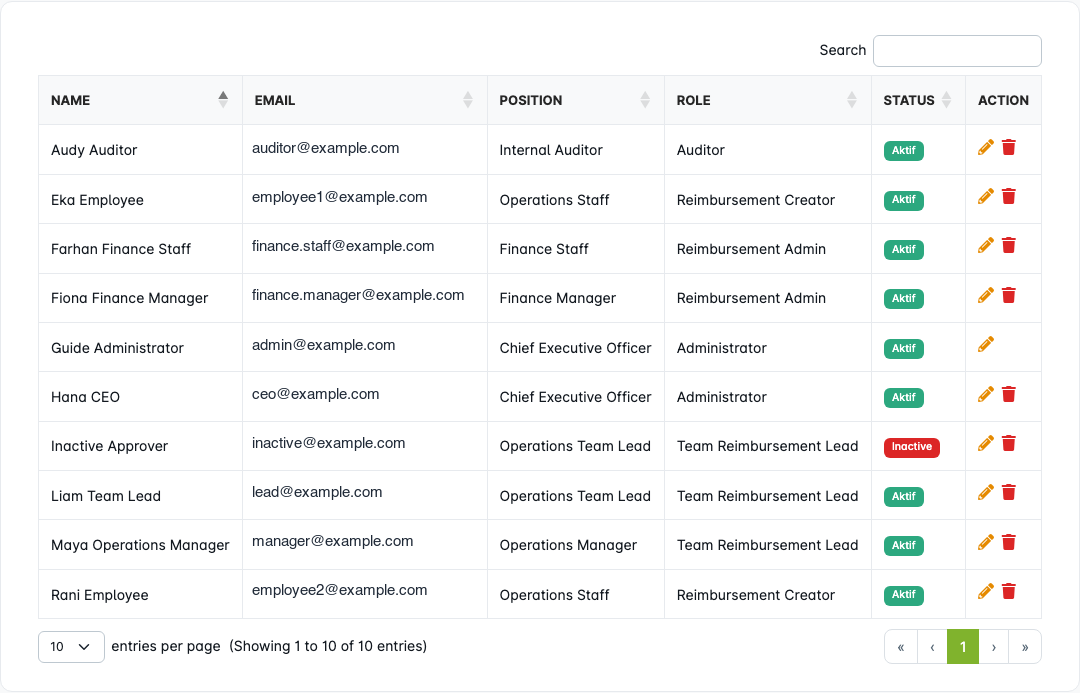
Users are the accounts that can sign in to the application. Each user can submit reimbursements, approve documents, or process payments depending on their role.
| Field | What It Controls |
|---|---|
| Full Name | The user's display name throughout the application. |
| Used for sign-in and email notifications. | |
| Role | Determines what menus and actions the user can access. |
| Position | Places the user in the company structure. Affects approval routing. |
| Bank account | The user's bank information, used when processing reimbursement payments. |
| Active / Inactive | Controls whether the user can sign in. |
Position is especially important because approval rules can use supervisor or PIC logic. If a user is assigned to the wrong position, approvals may go to the wrong person.
Example user-to-position mapping for a small company:
| User | Role | Position | Purpose |
|---|---|---|---|
| Company administrator | Administrator | Chief Executive Officer | Company setup and administration. |
| Finance manager | Reimbursement Admin | Finance Manager | Approves payments and manages batch payments. |
| Finance staff | Reimbursement Admin | Finance Staff | Supports payment processing. |
| Operations manager | Team Reimbursement Lead | Operations Manager | Approves team reimbursements. |
| Team lead | Reimbursement Creator | Operations Team Lead | Direct supervisor approval. |
| Employee | Reimbursement Creator | Operations Staff | Submits reimbursements. |
When an employee leaves the company or should temporarily lose access, set their status to Inactive instead of deleting the account. This preserves their reimbursement and approval history.
Import User
Use user import when you need to create many users at once instead of adding them one by one.
- Open User Management → User.
- Click Import and download the import template.
- Fill in user names, emails, roles, positions, and other required details in the template.
- Upload the completed template.
- Review any validation errors shown after upload.
- Confirm that imported users have the correct role and position.
Common import issues:
| Issue | What To Check |
|---|---|
| Role not found | Make sure the role name in the template matches an existing role exactly. |
| Position not found | Make sure the position name in the template matches an existing position exactly. |
| Duplicate email | The email may already be registered. Check the existing user list. |
| Missing required field | Fill in all required columns in the template before uploading. |
3. Configuration
Configuration controls how the company uses reimbursement and payment features. It is located in the sidebar under Configuration.
Company Settings
Open Configuration → Settings.
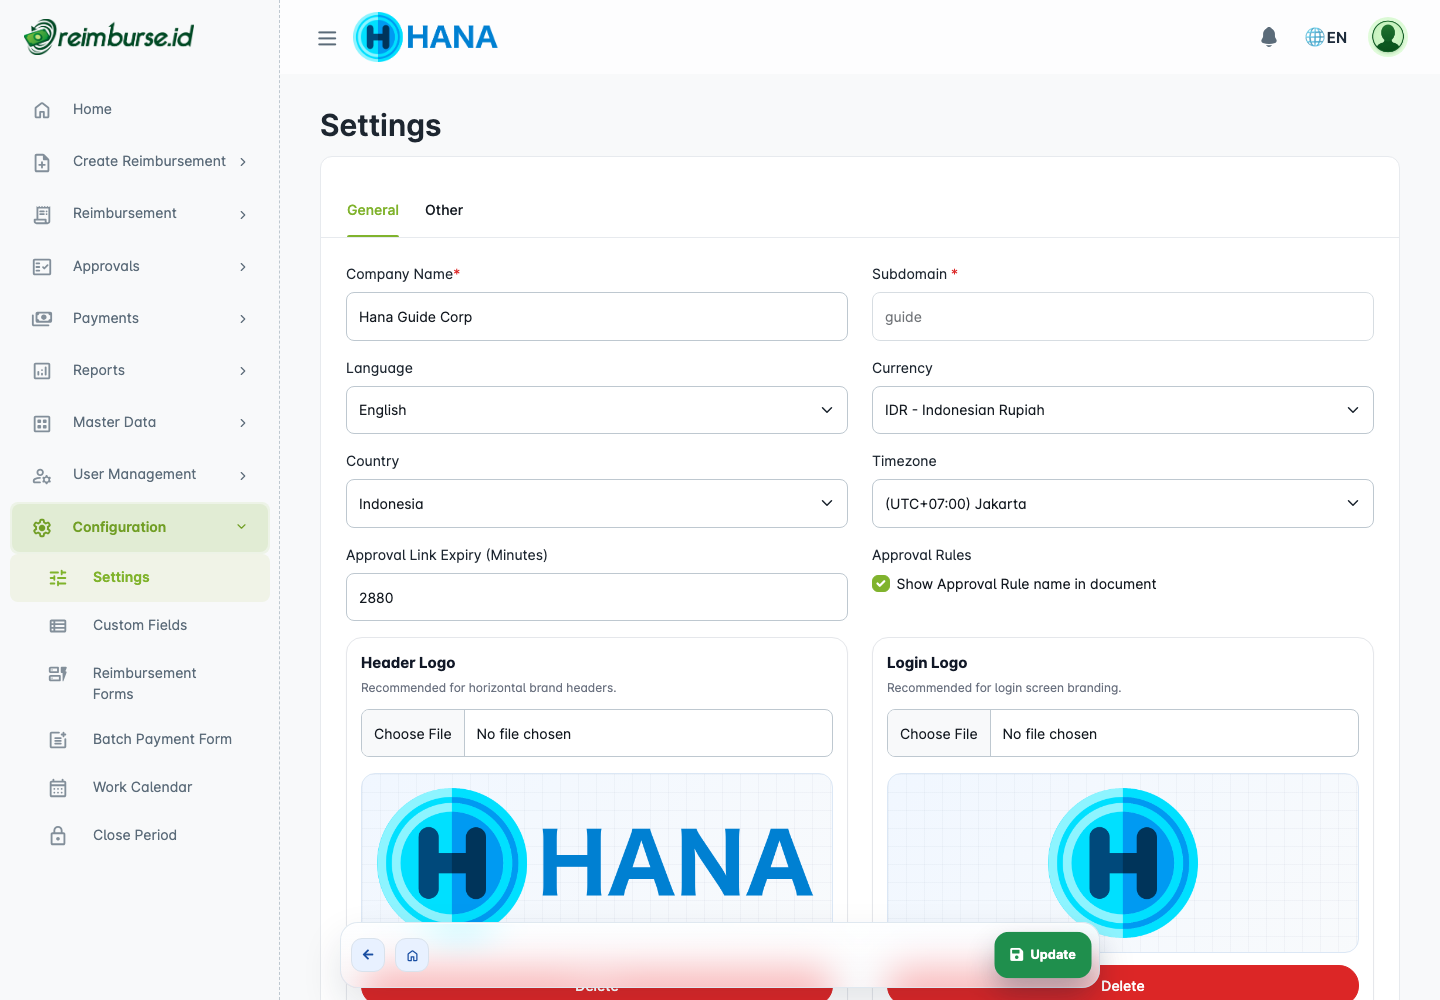
Company settings define basic company information and branding.
| Setting | Purpose |
|---|---|
| Company information | Name, address, and other details shown in documents and the company profile. |
| Header logo | Shown in the application header bar. |
| Login logo | Shown on the company login page. |
| Language and regional settings | Controls default display language and regional preferences. |
| Date Format | Controls how date-only values are shown and entered in this company. |
Date Format
Use Date Format when your company wants date inputs and date-only document fields to follow a specific format, such as YYYY-MM-DD.
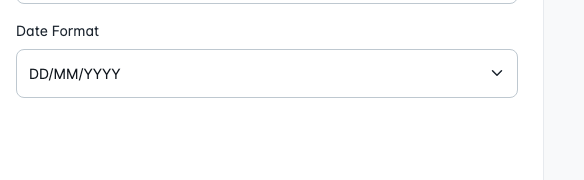
Important behavior:
- This setting changes how date-only values are shown and entered in the application for that company.
- It does not rewrite historical reimbursement or payment data.
- Different companies can use different date formats.
Custom Fields
Open Configuration → Custom Fields.
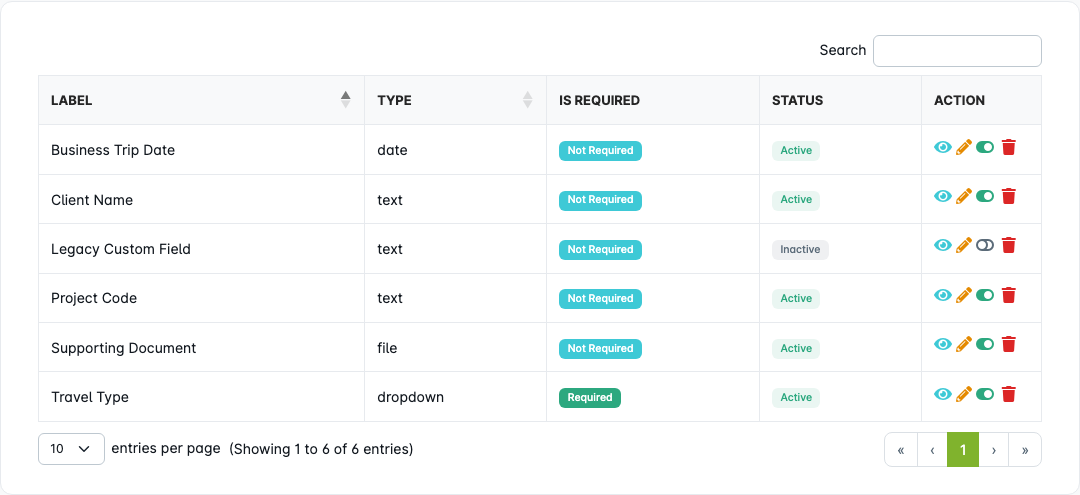
Custom fields add extra input fields to reimbursement or batch payment forms. Use them when the standard fields are not enough.
Examples:
| Field Name | Type | Use Case |
|---|---|---|
| Project Code | Text | Track expenses by project. |
| Client Name | Text | Identify client-related expenses. |
| Business Trip Date | Date | Record the business trip period. |
| Supporting Document | File | Upload an additional document that is not part of the main attachment. |
Recommended practice:
- Only create custom fields when the standard fields do not cover your needs.
- Mark a field as required only when every submission must include it.
- Keep field names simple so users understand what to fill in.
- Before deleting a custom field, check whether it is already used in forms, approval rules, or existing documents.
User Custom Fields
Open Configuration → User Custom Fields.
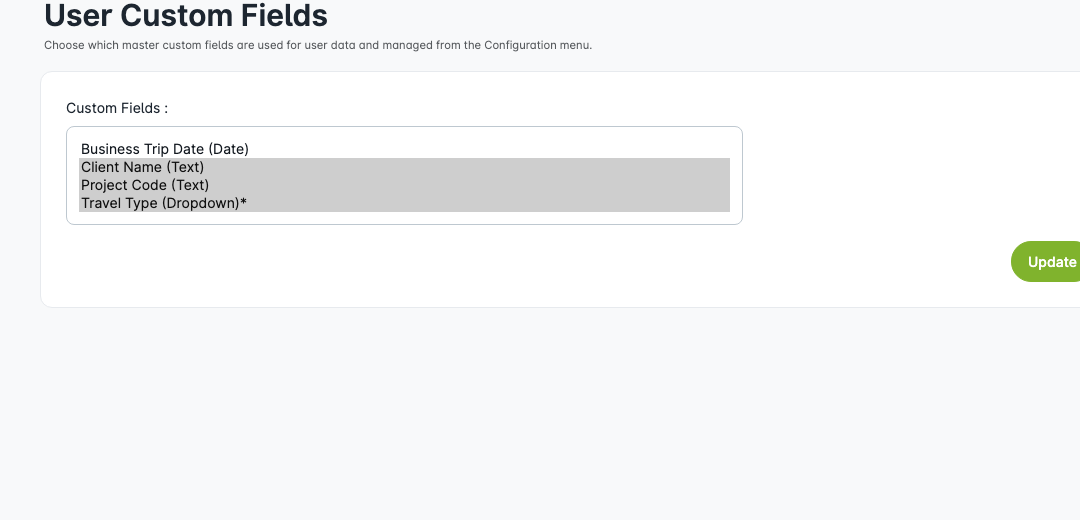
This menu controls which custom fields should be used as requestor-level fields in user-related flows.
Use this menu when the company needs additional requester information, such as:
- employee code,
- branch or location code,
- join date,
- tax or identity reference,
- other profile-like information that belongs to the requester instead of one reimbursement document.
Important behavior:
- The custom field must already exist in Configuration → Custom Fields.
- This menu chooses which custom fields are used for requester information.
- Requestor custom fields can later be used in reimbursement print templates through field mapping.
Reimbursement Forms
Open Configuration → Reimbursement Forms.
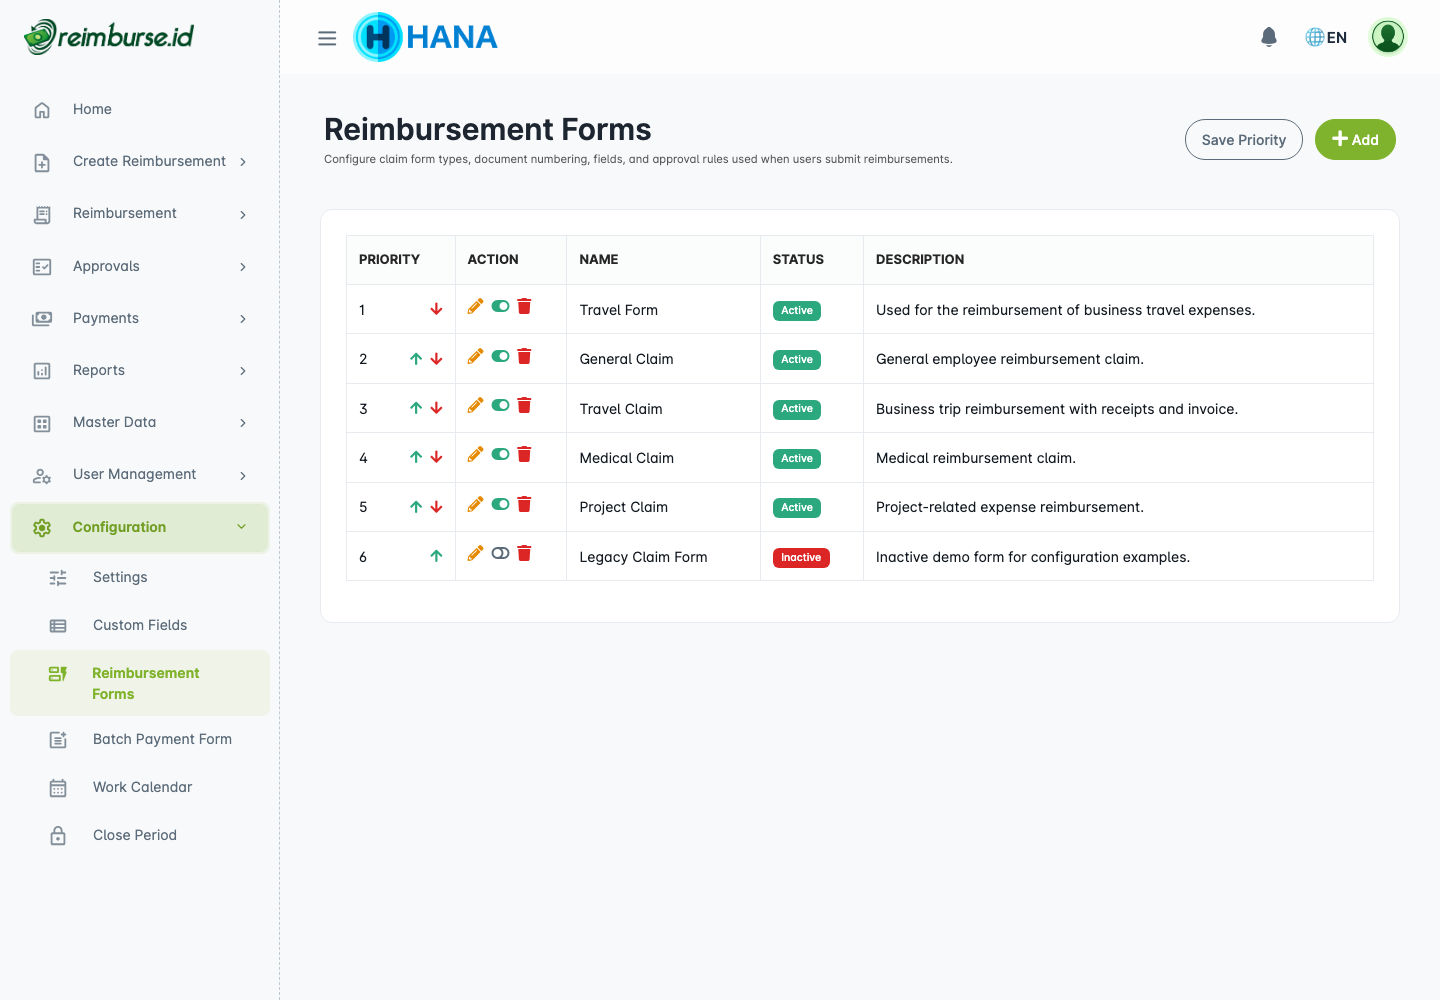
Reimbursement forms define the types of claims employees can submit. The first form was created during onboarding. You can edit that form or create additional forms here. This section gives a setup overview. For detailed setup of numbering, instructions, and approval rules, continue to Reimbursement Configuration.
Each form controls:
| Setting | Purpose |
|---|---|
| Name and description | Helps employees choose the correct form when creating a reimbursement. |
| Icon | Helps employees recognize the form in the create menu. |
| Priority | Controls the display order of forms in the menu. |
| Active / Inactive | Controls whether the form can be used for new submissions. |
| Read-only position | Uses the employee's position automatically and prevents manual changes. |
| Attachment required | Requires employees to upload at least one attachment before submitting. |
| Document numbering | Controls the format of the reimbursement number (prefix, running number, suffix, and reset period). |
| Custom fields | Adds extra fields to the form from the custom field library. |
| Detail custom fields | Adds extra fields inside each reimbursement detail row. |
| Print template | Links the form to a reusable reimbursement print template. |
| Enable Qty & Price | Changes detail entry from amount-only mode to qty-and-price mode. |
| Instructions | Shows guidance text to employees before they submit. |
| Approval rules | Defines who must approve reimbursements submitted through this form. |
Detailed field behavior such as Read-only date is covered in Reimbursement Configuration, where each flag is explained more precisely.
Document Numbering
Each reimbursement receives a unique document number. The format is configured per form.
| Part | Example | Meaning |
|---|---|---|
| Prefix | GEN-2604- | Identifies the form and period. |
| Running number | 00001 | Increases automatically for each new document. |
| Suffix | (optional) | Extra text after the number. |
Use the preview field to check how the document number will look before saving.
Approval Rules
Approval rules define who reviews and approves a reimbursement. Rules can be simple or conditional.
Example policy:
| Condition | Approval |
|---|---|
| All reimbursements | Supervisor approval. |
| Amount above Rp 1.000.000 | Supervisor approval, then PIC Top Position approval. |
Approver types available in approval rules:
| Approver Type | How It Works |
|---|---|
| Supervisor | The PIC of the position directly above the submitter's position. |
| PIC Top Position | The PIC assigned to the highest-level position in the submitter's position branch. |
| User | A specific user selected as the approver, regardless of position structure. |
Before using Supervisor or PIC Top Position approval, make sure positions and PIC assignments are set up correctly in Master Data → Position.
Print Templates
Open Configuration → Print Templates → Reimbursement Print.

Print Templates let administrators design reusable reimbursement print layouts at company level. A template is created once, then linked to one or more reimbursement forms.
Use Print Templates when:
- different reimbursement forms need different print layouts,
- the company wants printed output to match internal document standards,
- some claim types need extra print sections such as attachment previews or approval signatures.
Important behavior:
- Templates are reusable across multiple reimbursement forms.
- The reimbursement form decides which template is used.
- If a reimbursement form does not select a template, the system uses the default reimbursement print layout.
The detailed print builder explanation and assignment steps are covered in Reimbursement Configuration.
Batch Payment Form
Open Configuration → Batch Payment Form.
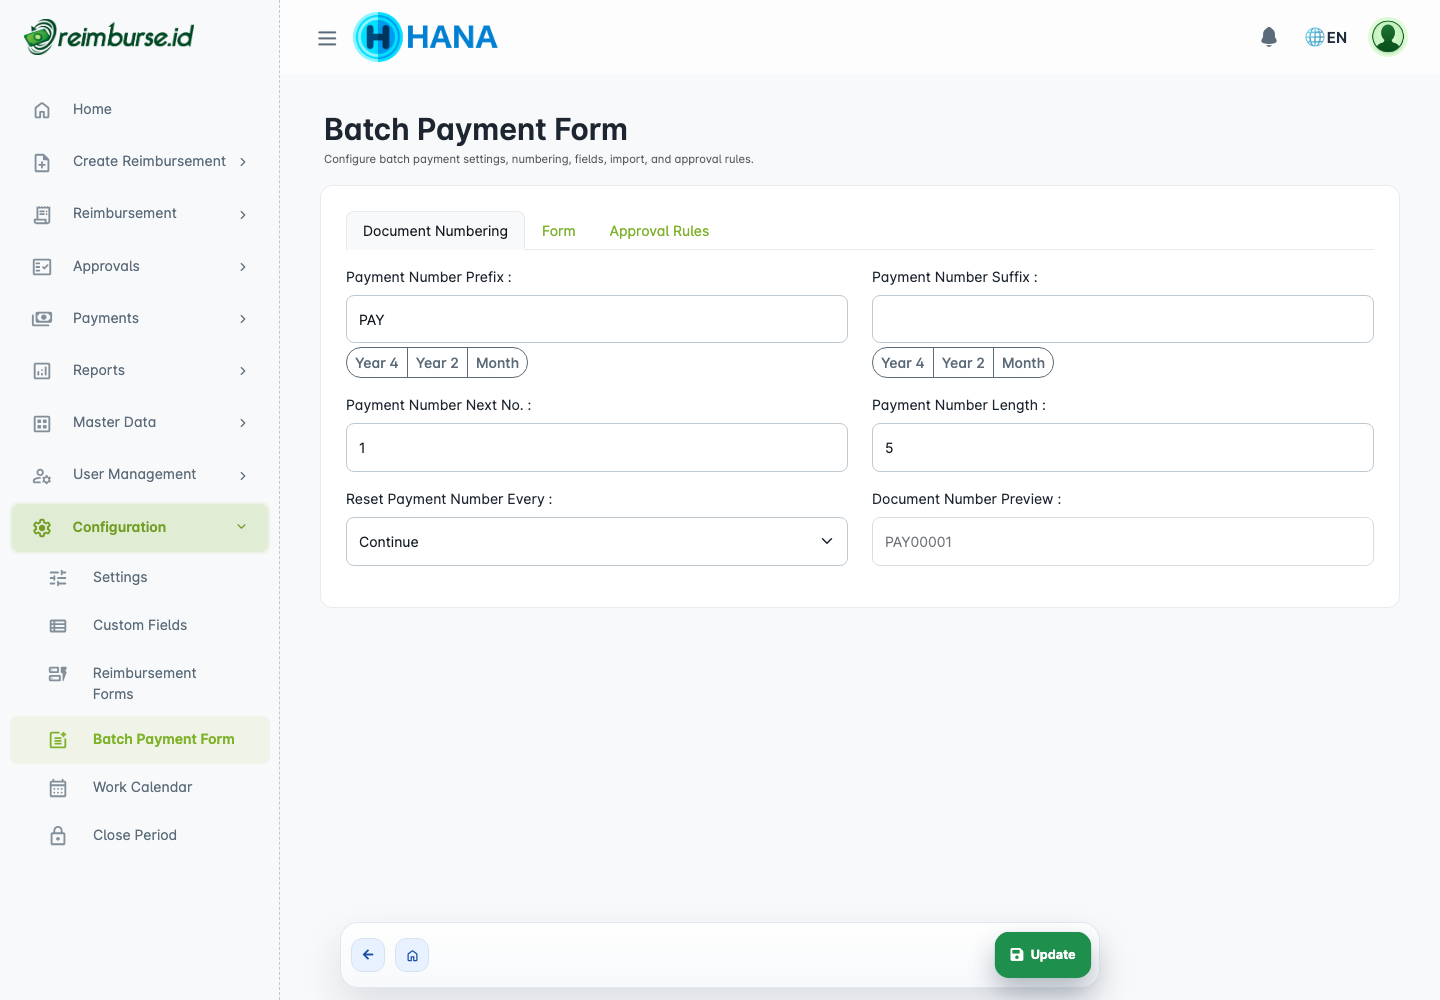
Batch Payment Form controls how the payment team groups approved reimbursements into payment batches. This section gives a setup overview. For the day-to-day payment flow, continue to Payment Operations And Batch Payment.
| Setting | Purpose |
|---|---|
| Document numbering | Controls the batch payment number format. |
| Custom fields | Adds extra information fields to batch payment documents. |
| Import | Supports importing reimbursement numbers into a batch. |
| Approval rules | Defines who approves a batch payment before it can be marked as paid. |
| Payment proof | Supports upload of payment evidence. |
Example batch payment approval policy:
| Condition | Approval |
|---|---|
| All batch payments | Finance Manager approval. |
| Batch amount above Rp 10.000.000 | Finance Manager approval, then CEO approval. |
Work Calendar
Open Configuration → Work Calendar.
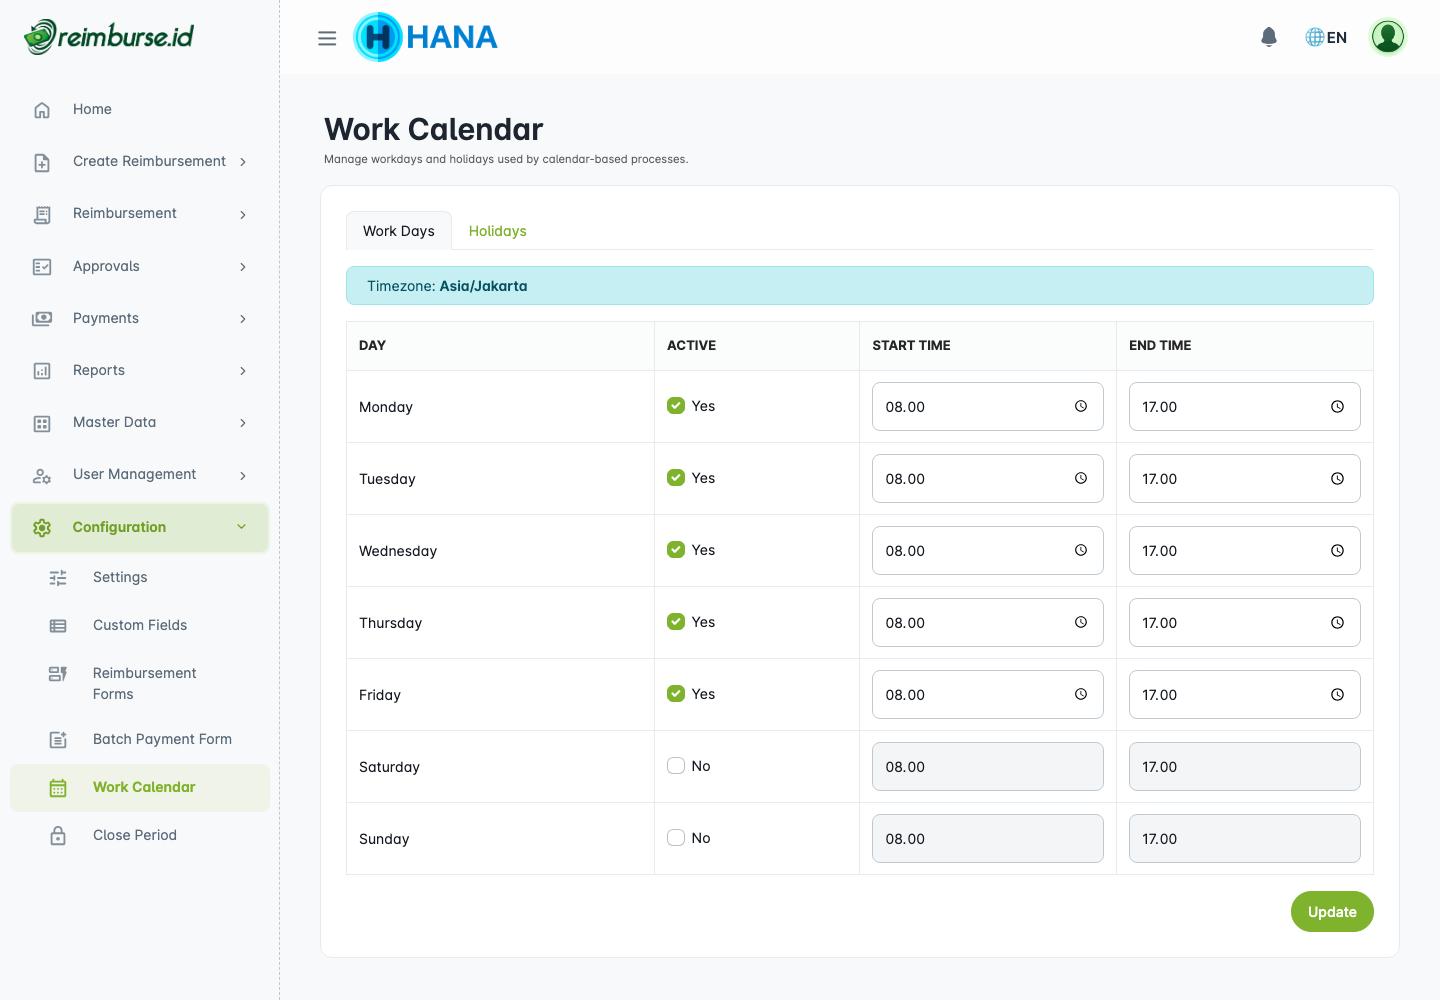
Work Calendar defines company working days and holidays. It is used for processes that depend on working-day calculations, such as approval duration reporting.
You can manage holidays in two ways:
| Method | When To Use |
|---|---|
| Create manually | Add individual holidays or company events one by one. |
| Import from template | Add many holidays at once, such as national holidays for an entire year. |
Recommended practice:
- Review the work calendar at the start of each year.
- Add national holidays and company-specific holidays.
- Update the calendar when new public holidays or company leave days are announced.
Close Period
Open Configuration → Close Period.
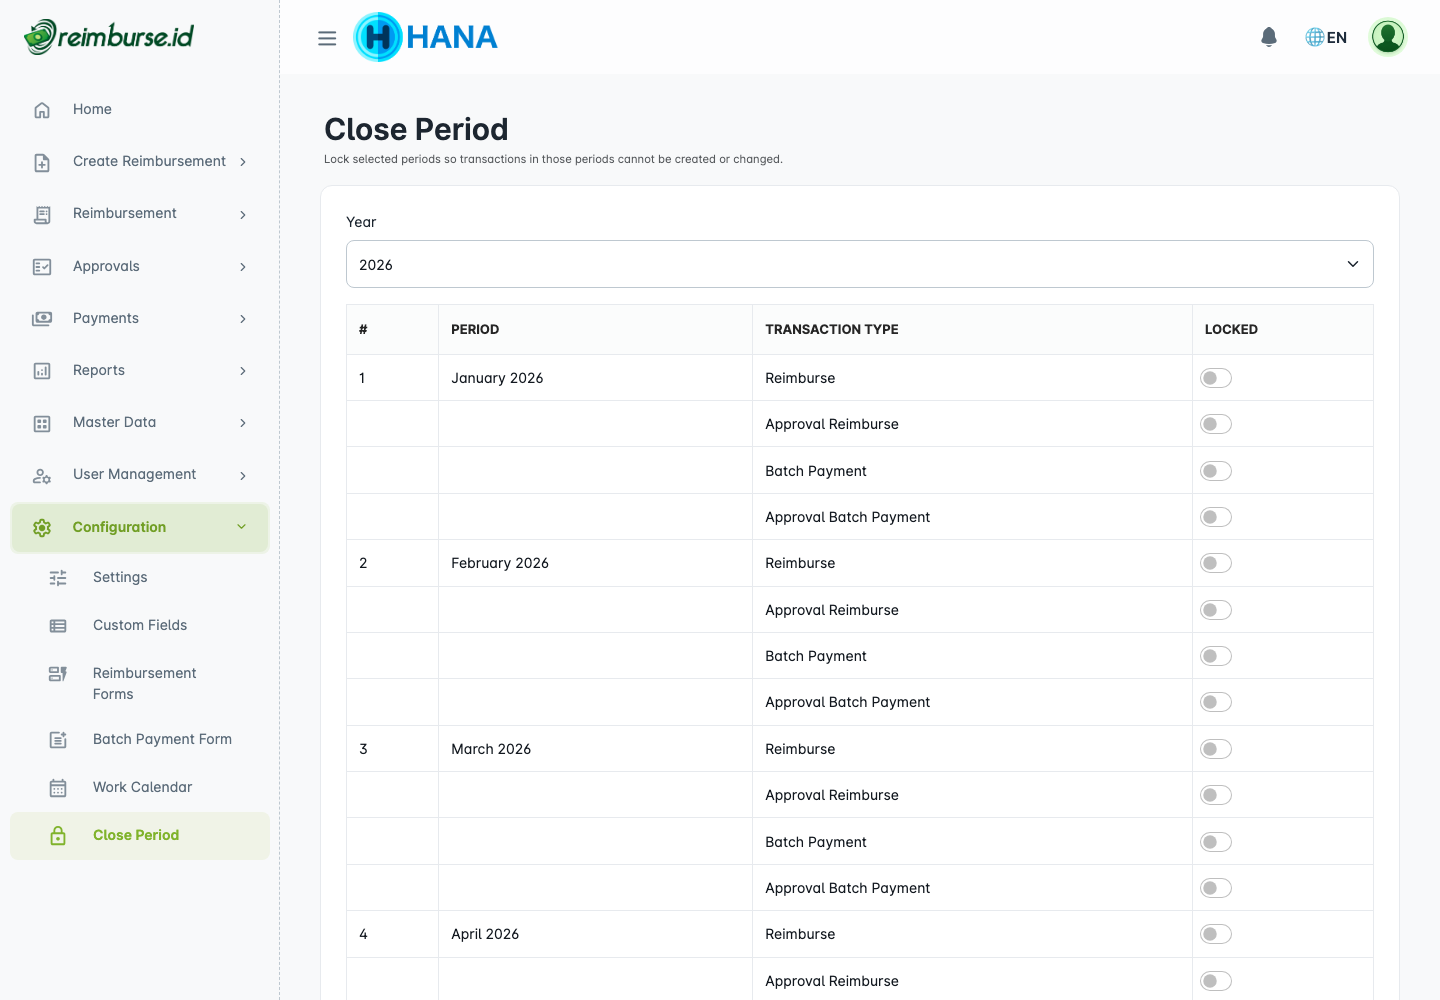
Close Period locks selected transaction types for a date range. This is typically used by the payment team or administrators after monthly reconciliation is complete.
The lock can be applied separately for reimbursement creation/changes, reimbursement approval, batch payment creation/changes, and batch payment approval. For example, if January is closed for reimbursements, users cannot create or change reimbursements dated in January.
Use Close Period carefully because it can affect many users depending on which transaction types are locked. Before closing a period, confirm with your team that no pending work remains for that period and transaction type.
4. Verify The Setup
After completing the configuration above, it is a good practice to verify that everything works correctly by following a real submission flow.
Suggested verification steps:
- Sign in as an employee account.
- Create a reimbursement using one of the active forms.
- Add at least one expense detail with an expense category and amount.
- Add an attachment if the form requires it.
- Submit the reimbursement.
- Sign in as the expected approver.
- Confirm the reimbursement appears in the approval queue.
- Approve or reject the reimbursement.
- If your company uses batch payments, confirm the approved reimbursement appears in the payment processing area for the payment team.
If the reimbursement does not appear for the correct approver, check:
- The employee's position assignment in User Management → User.
- The PIC assignment in Master Data → Position.
- The approval rules in Configuration → Reimbursement Forms.
Common Problems
| Problem | What To Do |
|---|---|
| A user cannot see a menu. | Check the user's role in User Management → Role. The role may not have access to that menu. |
| An expense category does not appear when creating a reimbursement. | Check whether the category is active in Master Data → Expense Category. This is different from the reimbursement form itself. |
| A position cannot be deleted. | The position may be assigned to users or used in approval rules. Deactivate it instead. |
| Approval goes to the wrong person. | Check the employee's position, the PIC assignments, and the approval rules for the reimbursement form. |
| A user cannot create a reimbursement for a specific period. | The period may be closed. Check Configuration → Close Period. |
| Imported users have the wrong role or position. | Edit each user individually in User Management → User or re-import with corrected data. |